Move & Match (demo)
How to develop a Playdate game in Lua
Introduction
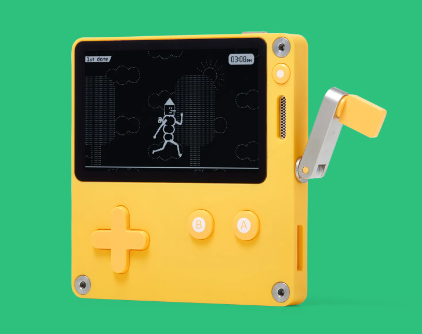
This article is about game development for Playdate. Playdate is a small portable console with a crank and a one-bit black-and-white screen with no backlight. The console is made “for fun.” It’s fun to play, but even more fun to develop for.
The Playdate SDK is free and includes an emulator, so you can start developing a game without owning the actual device.
Using the emulator, you can also check out games for the console that are available on Itch.io. However, games from the official Сatalog and Seasons cannot be played on the emulator — you need the device for that.
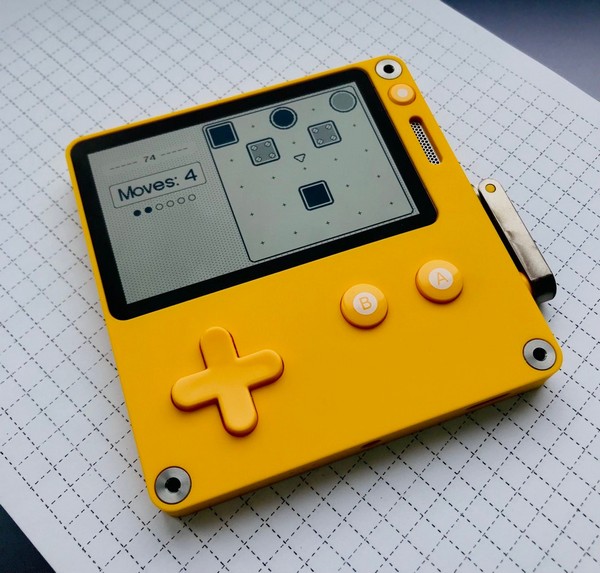
Here I’ve collected notes made during the development of my first Playdate game. My game Move & Match has already been released and is available in the catalog.
These notes may be useful both for those who want to start developing for Playdate and for those who are already doing so.
Lua. Getting Started
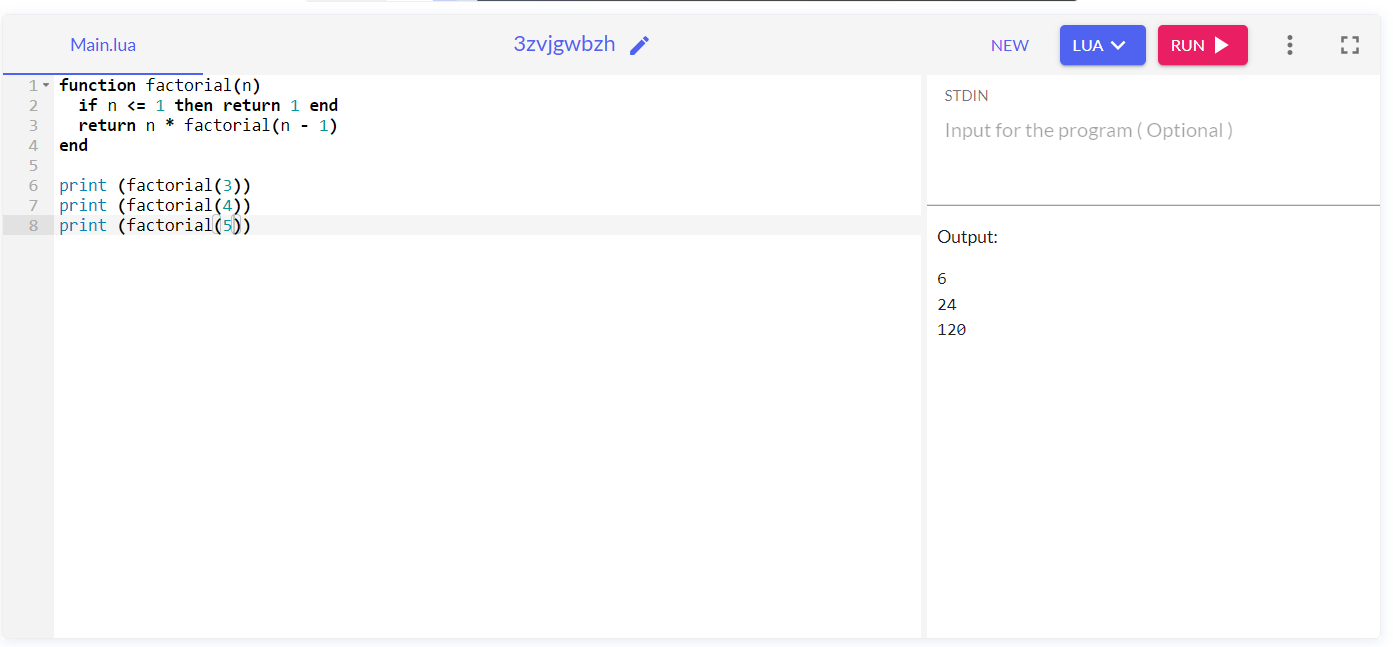
You can begin your journey right away with the language we’ll be using: Lua. To understand the basics, you don’t even need the Playdate SDK. You can start in any online Lua editor—for example, https://onecompiler.com/lua.
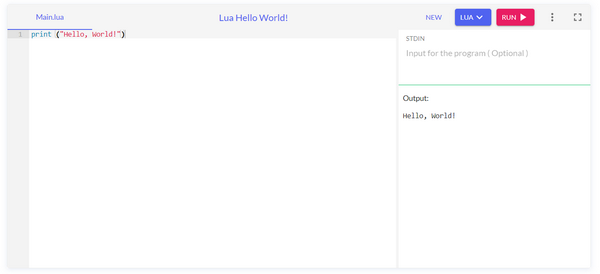
Write some code, click Run, and check the result in Output.
For learning the fundamentals, there’s a good article: Learn Lua in 15 Minutes. You can copy and paste the code from the article as is. For now, you can skip the sections about metatables, OOP, and modules.
Experiment with expressions and try writing small functions, such as calculating a factorial or raising a number to a power.
Work with main data structure: tables. You’ll use them to build arrays and lists. For example, you’ll store references to game objects in a scene or in a cache inside tables.
Check Lua’s standard table library. You’ll need functions such as table.insert() and table.remove().
Remember that if you need to insert an element at the end of a table, there are two ways:
table.insert(t, element)
or (preferable, as it’s considered more readable and doesn’t require a function call, and therefore is slightly faster):
t[#t+1] = element
Learn how to add and get (and remove) elements from tables, and how to loop through table elements.
Find out what the difference is between the following constructs:
- for i = 1, #t do
- for … in ipairs(…) do
- for … in pairs(…) do
Analyze the following example:
u = {}
u[-1] = "y"
u[0] = "z"
u[1] = "a"
u[3] = "b"
u[2] = "c"
u[4] = "d"
u[6] = "e"
u["hello"] = "world"
for i = 1, #u do print(i, u[i]) end
--[[
Output:
1 a
2 c
3 b
4 d
5 nil
6 e
--]]
print('---')
for key, value in ipairs(u) do print(key, value) end
--[[
Output:
1 a
2 c
3 b
4 d
--]]
print('---')
for key, value in pairs(u) do print(key, value) end
--[[
Output:
1 a
2 c
3 b
4 d
6 e
0 z
hello world
-1 y
--]]
⚠️ Be careful when removing elements from a table inside a loop. The following code can lead to unpredictable results:
u = {'To redact', 'To delete', 'To redact', 'To redact'}
for key, value in ipairs(u) do
  if value == 'To delete' then
    table.remove(u, key)
  else
    u[key] = 'Redacted'
  end
end
for key, value in ipairs(u) do print(key, value) end
--[[
Output:
1 Redacted
2 To redact
3 Redacted
--]]
Analyze this example. What happened to the table inside the loop? Why were not all elements of the table edited?
Study what the math library can do. Learn how to generate random values, perform operations such as finding the maximum, minimum, absolute value, and square root, and how to round numbers up or down.
Be careful when working with floating-point numbers. Remember about possible precision loss during operations.
print(0.101 + 0.098 - 0.098 == 0.101) -- true
print(0.102 + 0.098 - 0.098 == 0.102) -- false
Project Setup (Windows)
Video from SquidGod:
The empty project template mentioned in the video.
Playdate SDK Documentation
- Designing for Playdate
- The main Playdate SDK documentation for Lua. Keep it close at hand. To get started, read the following sections (you’ll explore the remaining sections as you dive deeper):
OOP in Lua
Use the following OOP patterns:
Declaring a Class and Constructor
-- File Ghost.lua
Ghost = {}
class('Ghost').extends()
-- or class('Ghost').extends('Monster') if inheritance is needed
function Ghost:init() -- constructor
    Ghost.super.init(self)
    -- A call to the parent method for inheritance.
    -- It may be omitted if there is nothing to inherit
    -- or if you don’t want to call the parent constructor.

    self.visible = false -- instance field
end
Class Methods
-- Static method or class method.
-- A method that does not access instance fields
function Ghost.boo()
    print('Boo')
end
-- Non-static method or instance method.
-- This method accesses fields of a specific instance
function Ghost:isVisible()
    return self.visible -- instance field
end
Creating a Class Instance
ghost = Ghost()
-- An instance of the class has been created.
Instance Methods and Fields
ghost.visible = true
print(ghost.visible) -- true
print(ghost.boo()) -- Boo
-- ghost.boo() is identical to Ghost.boo()
print(ghost:isVisible()) -- true
-- ghost.isVisible() will cause an error
Explanation of Colons
Here’s a fact that will help you better understand how OOP works in Lua and why “static” class methods use dots, while instance methods use colons.
The notation
function ClassName:fn(...)
is a shorthand for
function ClassName.fn(self, ...)
When you call a method on a class instance using a colon, you are actually calling a method on the class and passing a reference to the instance as an argument. The class method then performs the necessary operations on that instance.
That’s why you need to use the keyword self inside the method body before accessing fields and methods. This way, you’re referring to the instance that was passed into the method as an argument.
Here are two equivalent pieces of code for our class:
1.
function Ghost:isVisible()
    return self.visible
end
ghost = Ghost()
print(ghost:isVisible())
2.
function Ghost.isVisible(self)
    return self.visible
end
ghost = Ghost()
print(ghost.isVisible(ghost))
-- Which is identical to:
-- print(Ghost.isVisible(ghost))
-- And this is a class function
Sprites
Sprites are used to display objects on the scene. You can load ready-made images into sprites or generate images directly during program execution.
SDK documentation: 7.20. Graphics/Sprite
Sprites optimize the rendering process on the device. The screen is updated only in areas where something has actually changed. For example, if a sprite moves, only the area occupied by that sprite is redrawn. If a sprite, while moving, “touches” another sprite, the latter will also be partially redrawn, because it becomes “dirty” and needs its visual state to be updated.
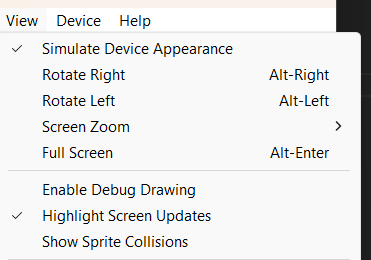
To see how sprite redrawing works, enable the following option in the simulator: View → Highlight Screen Updates. The areas being redrawn will be highlighted in yellow.
In some cases, you may need the screen to be fully redrawn every frame. To do this, use the following method:
playdate.graphics.sprite.setAlwaysRedraw(true)
This should be done when your game is so dynamic that there’s no point in calculating which areas need to be redrawn and which do not. Computing dirty regions takes time, which negatively impacts performance.
However, if your game is fairly static (for example, a turn-based puzzle), it’s better to keep this flag disabled. By “static,” I mean a game where changes mostly occur only in specific areas of the screen.
As a reminder, if you draw graphics using draw methods, cache them into images. Don’t redraw the same complex objects multiple times.
The same applies to text. If you want to display text as a sprite, convert the text into an image. Rendering text requires memory allocation and takes time. It can significantly hurt performance if the same text is being drawn somewhere in your game every frame.
Collisions
Sprites allow you to calculate collisions: who collided with whom and which sprites intersect.
The functionality is limited: hitboxes can only be rectangular and axis-aligned (they cannot be rotated). However, this is usually enough to make a game in genres such as shoot ’em up or a platformer without using a physics engine.
Keep in mind that in good games, the hitboxes of the player character, enemies, and obstacles are always slightly smaller than their sprite areas. For bonuses and weapons, on the contrary, hitboxes are usually larger.
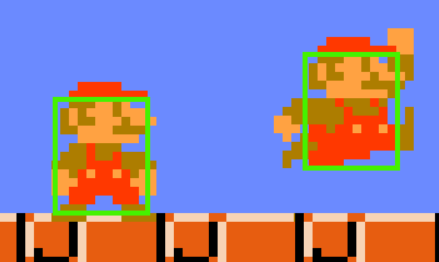
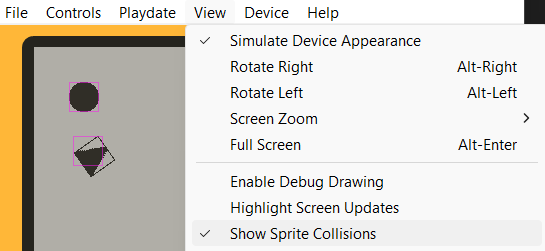
To see colliders in the simulator, use the option View → Show Sprite Collisions.
You can also use the alphaCollision method to check collisions at the pixel level. First, you detect a collision using rectangular colliders, and then refine the result with per-pixel collision checking.
Animated Sprites
Study the documentation section about the imagetable structure: 7.20 Graphics/Image Table. You’ll use this structure to create frame sequences for your animations.
To create animated sprites, use the AnimatedSprite library by Whitebrim. The library is well documented — be sure to check out the usage examples.
Don’t forget to cache loaded imagetables and states from JSON if you need to create multiple sprites with the same animation.
YourAnimatedSprite = {}
class('YourAnimatedSprite').extends(AnimatedSprite)
local imagetable = playdate.graphics.imagetable.new('assets/images/animation')
local states = AnimatedSprite.loadStates('assets/images/animation.json')
function YourAnimatedSprite:init()
    YourAnimatedSprite.super.init(self, imagetable, states, true)
end
Movement Animation
For smooth movement of objects or smooth changes of their properties over time, you can use the PlaydateSequence class by NicMagnier.
This class lets you configure and run sequences. A sequence, simply put, is the behavior of some parameter over time. For example, you can create a sequence that changes a parameter from 0 to 10 over 5 seconds, and then from 10 to 15 over another 1 second. You can then read this sequence parameter on every game frame and apply it directly to a property of an object—for example, changing a sprite’s position. As a result, the sprite will move smoothly.
Study the examples in the library documentation.
If you’ve never worked with easing functions before, here’s a handy cheat sheet on how they work:
https://easings.net/ru
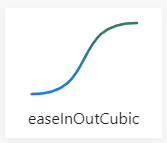
I use sequences to create animated UI elements (appearing, disappearing, moving to a specific point). Below is a demonstration using a sliding sprite as an example.
main.lua
import "CoreLibs/object"
import 'CoreLibs/graphics'
import 'CoreLibs/sprites'
import 'sequence' -- Place sequence.lua next to main.lua
Graphics = playdate.graphics
import 'PopupSprite'
function showEndCallback()
popupSprite:hide(hideEndCallback)
end
function hideEndCallback()
popupSprite:show(200, 120, showEndCallback)
end
popupSprite = PopupSprite()
popupSprite:show(200, 120, showEndCallback)
function playdate.update()
  sequence.update()
  Graphics.sprite.update()
end
PopupSprite.lua
PopupSprite = {}
class('PopupSprite').extends(Graphics.sprite)
function PopupSprite:init()
    local image = Graphics.image.new(50, 50)
    Graphics.pushContext(image)
        Graphics.setColor(Graphics.kColorBlack)
        Graphics.fillCircleInRect(0, 0, 50, 50)
    Graphics.popContext()
    PopupSprite.super.init(self, image)
    self._sequenceY = nil
end
function PopupSprite:remove()
    PopupSprite.super.remove(self)
    self:_stopSequences()
end
function PopupSprite:_stopSequences()
    if self._sequenceY ~= nil then
        self._sequenceY:stop()
        self._sequenceY = nil
    end
end
function PopupSprite:update()
    PopupSprite.super.update(self)
    self:_updatePosition()
end
function PopupSprite:_updatePosition()
    if self._sequenceY ~= nil then
        self:moveTo(self.x, self._sequenceY:get())
    end
end
function PopupSprite:show(x, y, callback)
    local function sequenceCallback()
        self:_updatePosition()
        self._sequenceY = nil
        if callback ~= nil then
            callback()
        end
    end
    self:_stopSequences()
    self:addSprite()
    self:moveTo(x, y - 240)
    self._sequenceY = sequence.new()
        :from(y - 240)
        :to(y, 1, 'outBack')
        :callback(sequenceCallback)
self._sequenceY:start()
end
function PopupSprite:hide(callback)
    local function sequenceCallback()
        self:_updatePosition()
        self._sequenceY = nil
        self:removeSprite()
        if callback ~= nil then
            callback()
        end
    end
    self:_stopSequences()
    self._sequenceY = sequence.new()
        :from(self.y)
        :to(self.y - 240, 1, 'inBack')
        :callback(sequenceCallback)
self._sequenceY:start()
end
You can use sequences for various “programmatic” animations. For example, you can create rolling numbers in a counter or a blinking effect (by interpreting the current sequence values inside your update logic in whatever way you need).
Scene Management
You’ll need to create different scenes in your game, at minimum a main menu and the game scene itself. For this, it’s useful to have a scene manager.
There’s a video explaining what scenes are and how to create your own scene manager.
I recommend using ready-made solutions—frameworks that already provide scene management functionality:
-
Noble Engine: https://noblerobot.com/nobleengine
Another scene management framework: Roomy for Playdate
https://github.com/RobertCurry0216/roomy-playdate
User Interface
Gridview
To create a list of items, such as menu entries, use the class: playdate.ui.gridview
Optimization tip: cache images for rendering elements, especially if they contain text. Create an array of cached grid items and draw them in gridview:drawCell() in their ready-to-use form.
Pd-options
Pd-options is a multifunctional library for creating menus, settings lists, and more:
https://github.com/macvogelsang/pd-options
Originally used in Sparrow Solitaire (the game has a demo). One of the most feature-rich Playdate applications with many options and settings. The demo is recommended for study.
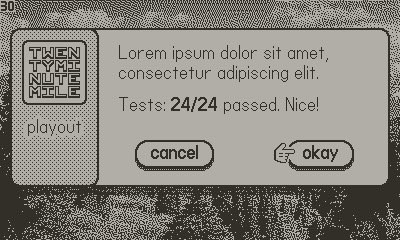
Playout
Playout is a library for creating popups:
https://github.com/potch/playout
DisplayObject
My small DisplayObject class is useful for building UI layouts. It allows you to create nested, on-screen objects. This is helpful for interfaces with hierarchies—when there are parent and child objects. For example, a sliding page with buttons and texts, which contains an animated block with more buttons inside.
-
If you want to use update methods, it’s enough to update the parent
DisplayObject. Updates propagate to child objects. -
The
Displaymethod is used to add a parent object to the scene. -
Supports nested positions and visibility properties.
Sounds
To work with sounds, read chapter 7.28: Sound in the Playdate SDK documentation.
For Playdate apps, convert music and sounds to WAV format with IMA ADPCM codec using a free editor like Audacity. This keeps file sizes small and CPU load minimal.
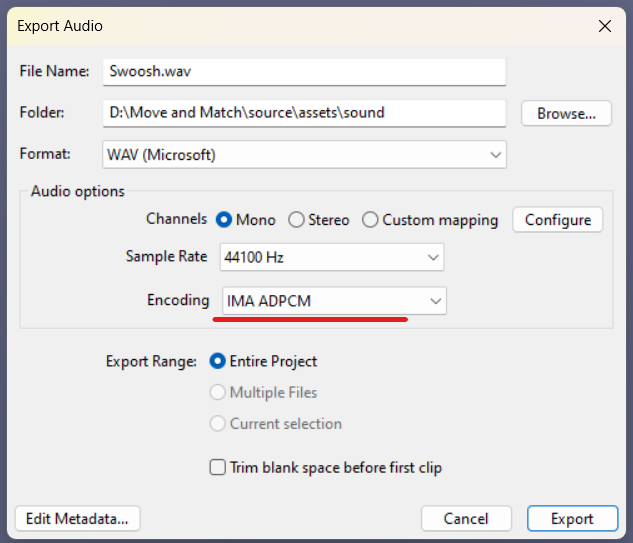
It’s also useful to save sounds and music in mono, which halves the file size.
The device has a mono speaker but includes a headphone jack. A stereo dock has also been announced. The choice of mono or stereo is up to you.
Lua Tricks
Default function arguments
function func(x)
    x = x or 5
    return x
end
print(func(1)) -- 1
print(func())  -- 5
Only works for non-boolean arguments. For booleans:
function func(flag)
    if flag == nil then
        flag = true
    end
    return flag
end
print(func(false)) -- false
print(func())      -- true
Ternary operator alternative
Lua has no ternary operator. You can use the and-or trick, but carefully (x cannot be false or nil):
result = condition and x or y
Example. Kronecker delta:
function KroneckerDelta(x, y)
    return x == y and 1 or 0
end
print(KroneckerDelta(5, 5)) -- 1
print(KroneckerDelta(3, 2)) -- 0
Tables as function arguments without parentheses
function func(t)
    print(t.x)
end
func{x = 0}
Optimization Tips
- Cache texts that will move as images instead of drawing them every frame.
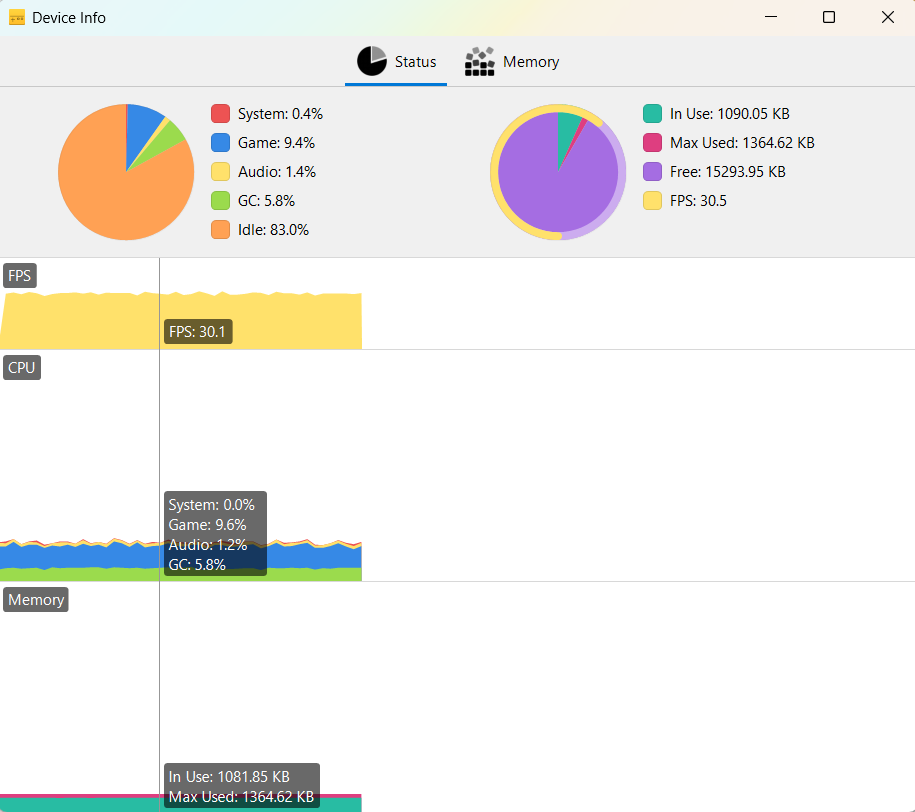
- Use the profiler (Device → Show Device Info) to monitor performance and memory usage.

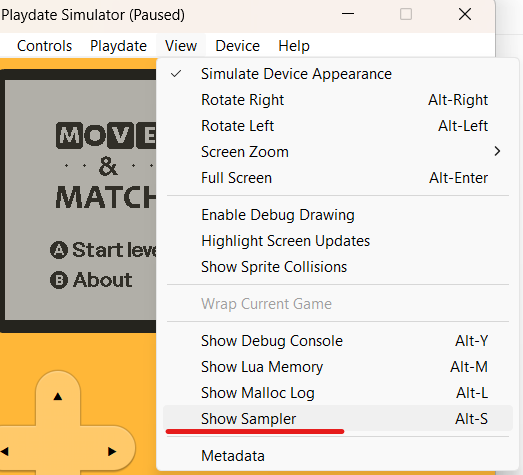
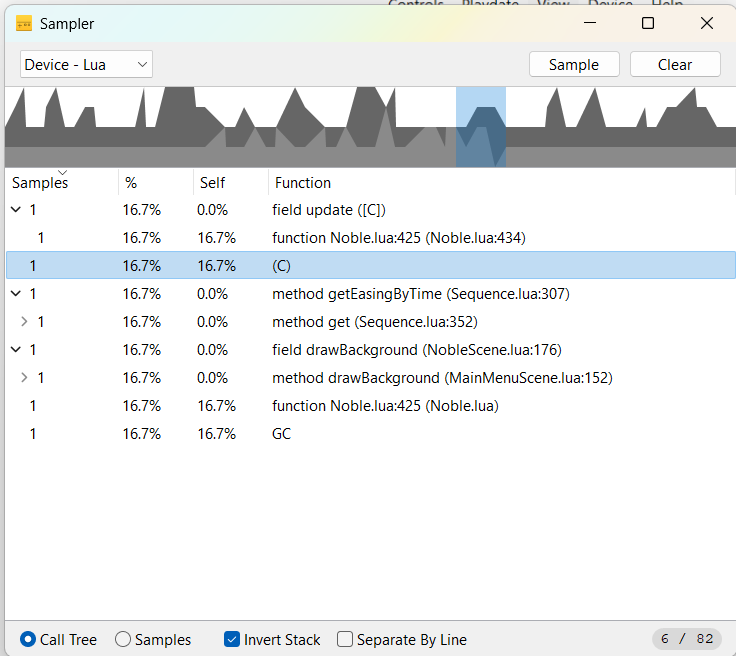
- Use the sampler (View → Show Sampler) to find CPU-heavy code sections.
- Reuse objects instead of frequently creating/deleting them to reduce GC pauses. Object pool:
ObjectViewPool = {}
class('ObjectViewPool').extends()
function ObjectViewPool:init()
    ObjectViewPool.super.init(self)
    self._objectViews = {}
end
function ObjectViewPool:push(objectView)
    self._objectViews[#self._objectViews + 1] = objectView
end
function ObjectViewPool:pop()
    if #self._objectViews == 0 then return nil else return table.remove(self._objectViews) end
end
Common Bugs
-
Incorrect use of
.vs:in instance method calls. -
Confusing conditions.
-
Comparisons with floating-point numbers.
-
Not checking for
nilin function arguments. -
Table manipulation errors.
Use printTable() to debug tables fully instead of print().
Art Preparation
Draw game elements with vector tools.
-
Apply filters to achieve proper one-bit look for Playdate.
-
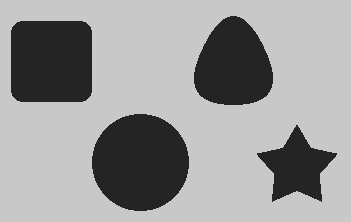
Rasterize the image when ready, save as a layout (
Layout.PNG). -
Slice the image into assets using selection tools.
Template for Photoshop:
Download link
GFXP
Playdate pattern editor by Ivan Sergeev:
https://dev.crankit.app/tools/gfxp/
Example usage:
import 'lib/gfxp'
local gfxp <const> = GFXP
gfxp.set('darkgray-2')
-- or directly
playdate.graphics.setPattern({0x88,0x88,0x88,0x88,0x22,0x22,0x22,0x22})
Useful Links
- Awesome Playdate libraries: https://github.com/sayhiben/awesome-playdate
- Playdate SDK Resources Wiki: https://playdate-wiki.com/wiki/SDK_Resources
- Art resources: https://playdate-wiki.com/wiki/Art_Resources
- Code snippets: https://devforum.play.date/t/a-list-of-helpful-libraries-and-code/221/21
UX checklist: https://help.play.date/developer/user-experience-checklist/
Communities
- Reddit: https://www.reddit.com/r/PlaydateConsole/
- Reddit: https://www.reddit.com/r/PlaydateDeveloper/
- Discord: https://discord.gg/zFKagQ2
- Twitter list of Playdate developers: https://twitter.com/i/lists/1696481244949651823
Leave a comment
Log in with itch.io to leave a comment.